To add a vignette in Photoshop, select the image layer, create a new layer, and select the ellipse tool. Draw an elliptical selection, feather the edges, and darken the edges with the paint bucket tool.
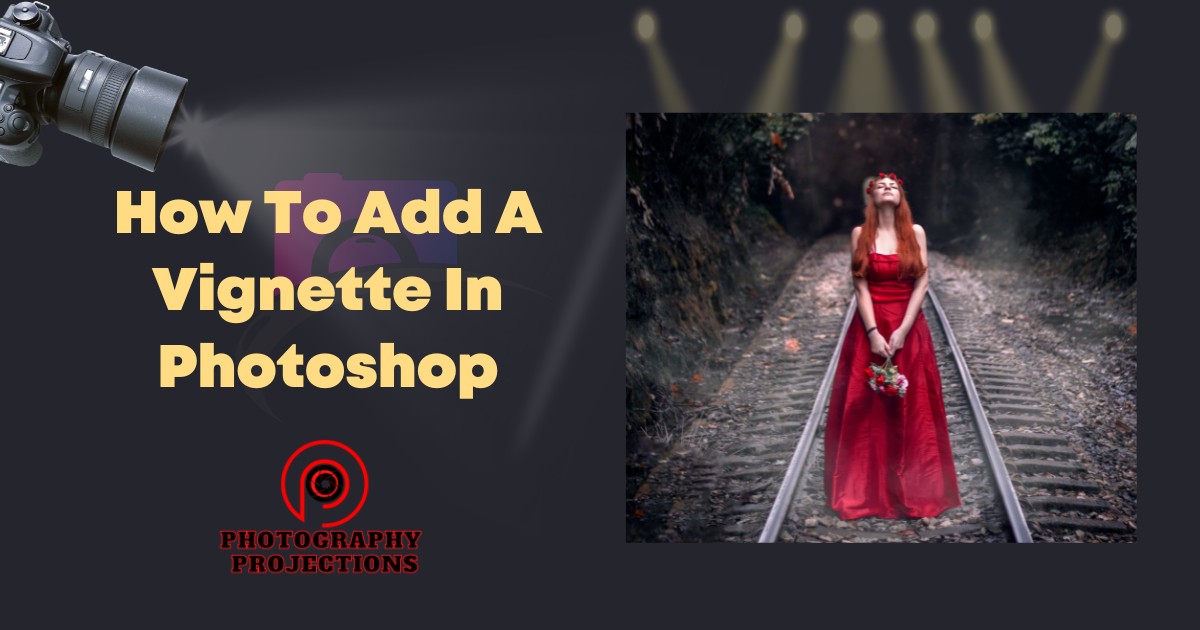
If you want to add a subtle yet dramatic effect to your photo, consider adding a vignette. This technique involves darkening the edges of the image while keeping the center bright. It can add depth and focus to your subject, making it stand out more.
While there are various ways to create a vignette effect, photoshop offers a simple and effective method. Follow the steps above to learn how to add a vignette to your photos in Photoshop. With these tips, you can take your photography and editing skills to the next level!
A Brief Introduction To Vignette
Defining Vignette
A vignette is a photo editing technique that is used to focus a viewer’s attention on the subject of the photo. It darkens the edges of an image so that the center is brighter and more prominent. When done correctly, a vignette can add depth, drama, and professional touch to an otherwise dull photo.
It is a versatile tool that can be used for many types of photography, including portraits, landscapes, and still lifes.
Below are the key points to keep in mind when adding vignettes:
- A vignette is a photo editing technique used to focus the viewer’s attention on the subject
- It darkens the edges of the photo
- The center of the photo becomes brighter and more prominent
- A vignette can add depth, drama, and professionalism to a photo
- It is versatile and can be used for many types of photography
Why Use A Vignette In Editing
Vignettes are used in photo editing for a variety of reasons. They can enhance any photo by adding a subtle touch that enlivens the image and makes it more visually appealing.
Below are some common reasons why a vignette might be used:
- To draw attention to the subject of the photo
- To add depth and texture to the photo
- To create a more cinematic effect
- To convey a certain mood or emotion
- To eliminate distracting elements in the background
Understanding The Types Of Vignette
There are two types of vignettes: natural and artificial. Natural vignettes are created by the camera lens and occur when the edges of the photo are naturally darker than the center.
This type of vignette is the result of the physical properties of the camera lens and is difficult to control. Artificial vignettes, on the other hand, are created in post-production.
They allow the photographer to have complete control over the amount, shape, and position of the vignette. Below are some key points to keep in mind when using vignettes:
- There are two types of vignettes: Natural and artificial
- Natural vignettes occur naturally and are difficult to control
- Artificial vignettes are created in post-production and give the photographer complete control
- With artificial vignettes, the photographer can control the amount, shape, and position of the vignette
- Both natural and artificial vignettes can be used to enhance any photo and create the desired effect
How To Create A Vignette In Photoshop
Step-By-Step Guide To Adding Vignette To Your Photos
If you’re looking to add some drama to your photos, creating a vignette in Photoshop is a fantastic way to achieve that effect. A vignette darkens the edges of your image, making the subject stand out.
Here is a step-by-step guide to adding a vignette in Photoshop:
- Open your image in Photoshop and create a new layer. To do this, click on the ‘layer’ menu at the top of the screen and select ‘new layer’. Press ‘ok’.
- Next, choose the ‘elliptical marquee tool’ from the toolbar on the left-hand side of the screen. Use this tool to draw an oval shape in the center of your image.
- Once you have your shape, go to ‘select’ in the top menu and click ‘inverse’. This will select the outer part of the image.
- Then, go to ‘edit’, ‘transform’ and click ‘scale’. Drag the corners of the shape inwards to make it smaller, leaving a larger area of the edges of the image selected.
- With the selection still active, go to ‘filter’ in the top menu and choose ‘lens correction’. Under the ‘custom’ tab, drag the ‘vignette’ slider to the left to darken the edges. Adjust the ‘midpoint’ slider to control the size of the vignette.
- Finally, deselect the selection by pressing ‘ctrl+d’ on your keyboard. Save your image.
Using The Lens Correction Filter To Create A Vignette
One of the quickest and easiest ways to create a vignette in Photoshop is to use the ‘lens correction’ filter.
- Open your image in Photoshop and duplicate the layer by clicking ‘layer’ in the top menu and selecting ‘duplicate layer’.
- With your duplicated layer selected, go to ‘filter’ in the top menu and select ‘lens correction’.
- Under the ‘custom’ tab in the ‘lens correction’ window, drag the ‘vignette’ slider to the left to darken the edges.
- Adjust the ‘midpoint’ slider to control the size of the vignette.
- Click ‘ok’ to apply the filter and save your image.
Adjusting The Vignette’S Shape And Size
If you want to make your vignette look more natural, you can adjust its shape and size.
- Create a new layer by clicking on the ‘layer’ menu at the top of the screen and selecting ‘new layer’.
- Use the ‘elliptical marquee tool’ to draw an oval shape in the center of your image.
- With this shape selected, go to ‘edit’, ‘transform’ and click ‘scale’. Drag the corners of the shape inwards to make it smaller, leaving a larger area of the edges of the image selected.
- Use the ‘feather’ option in the ‘select’ menu to smooth out the transition between the edges and the center of the image.
- Apply the ‘lens correction’ filter to darken the edges of the image and adjust as needed.
- Deselect by pressing ‘ctrl+d’ on your keyboard and save your image.
Now that you know how to create a vignette in Photoshop, you can add this dramatic effect to your photos and make them stand out. Experiment with different shapes and sizes to create the perfect look for your photos. Happy editing!
Applying Advanced Vignette Techniques
Are you looking to add a dramatic effect to your photos? Adding a vignette is an excellent way to enhance their drama and draw viewers’ attention to the focal point.
We will take a look at some advanced vignette techniques that you can use to create unique and compelling images.
Blending Two Vignettes Together
One way to add depth and dimension to your images is by blending two vignettes together.
- First, create two vignette layers by following the instructions for adding a vignette in Photoshop.
- With the first vignette layer selected, navigate to the layers panel.
- Change the blending mode to overlay or soft light to blend the two vignettes seamlessly.
- Adjust the opacity of each layer until you achieve the desired effect.
- Save your image and enjoy your newfound creativity!
Creating A Color Vignette
Adding a color vignette can add a unique and bold look to your photos.
- Double-click the background layer to unlock it.
- Create a new layer by clicking on the “new layer” icon in the layers panel.
- Select the elliptical marquee tool from the toolbar and make an ellipse.
- Fill the ellipse with the color of your choice using the paint bucket tool.
- Navigate to the layers panel and change the blending mode to multiply.
- Adjust the opacity to your liking.
- Save your image to your desired file format.
Adding An Overlay To Create A Vignette Effect
Overlays are a popular way to add texture and depth to your photos.
- First, create a new layer by clicking on the “new layer” icon in the layers panel.
- Download a vignette overlay and drag it into your Photoshop canvas.
- Resize and position the overlay to your desired location.
- Change the blending mode to multiply or overlay in the layers panel.
- Adjust the opacity and any other settings to your desired effect.
- Save your image to your desired file format.
With these advanced vignette techniques, you can take your photo-editing skills to the next level. Try experimenting with blending two vignettes, creating a color vignette, or adding an overlay to create your own unique look. Happy editing!
Tips And Tricks For Perfectly Applying A Vignette
Choosing The Right Photo For Vignetting
Adding a vignette to a photo can add a touch of drama or focus the viewer’s attention on the subject. However, not all photos suit this technique.
Here are a few things to keep in mind when choosing a photo for vignetting:
- Look for photos with a strong focal point or subject in the center. The vignette can help create a spotlight effect around the subject.
- Avoid photos with very busy backgrounds as the vignette may not be as effective.
- Consider the mood or message of the photo. Vignettes can add a vintage or romantic feel to a photo.
Saving Time With Presets
Creating a vignette from scratch can take a bit of time and effort. However, photoshop has built-in presets that can save time and achieve consistent results.
- Use the preset that best matches the photo’s lighting. Photoshop offers dark, medium, and light presets.
- Adjust the amount of the preset using the slider provided to achieve the desired effect.
- Save a custom preset if you often use the same settings for your vignettes.
Avoiding Overuse Of Vignette
While a vignette can add a touch of artistry to a photo, overusing it can lead to an unfavorable result.
- Apply the vignette subtly, as the purpose is to draw attention to a subject, not detract from it.
- Avoid applying a vignette to every photo. Certain photos may not benefit from vignetting.
- Use the appropriate amount of vignettes for the photo’s style and mood. A dark and moody photo may require a stronger vignette, while a bright and cheerful photo may only need a subtle touch.
That’s all for now. Hopefully, these tips and tricks will help you add vignettes to your photos like a pro!
Common Issues With Adding Vignette And How To Fix Them
Adding a vignette to your photographs can be a fantastic way to enhance the overall mood and draw your viewer’s attention to your subject. However, the process is not without potential issues, and problems can occasionally arise.
Fortunately, many common vignette-related issues are quick and straightforward to fix.
Overexposure Issues
One of the common problems you might run into when adding a vignette is that the edges of your photo become overexposed, resulting in a bright, distracting halo around the perimeter. This effect can occur for a variety of reasons, including incorrect settings and inexperience with the tools you’re using.
To correct this issue, consider trying the following solutions:
- Reduce the vignette’s size so that it doesn’t extend as far into the edges of the photo, thus reducing the amount of light that the effect adds.
- Try adjusting the ‘midpoint’ setting to increase the vignette effect’s size while also softening the edges.
- Adjust the photo’s overall exposure settings to correct for the overexposure caused by the vignette. Use the ‘highlight/shadow’ tool to darken the edges of the photo without affecting the subject’s exposure.
Overvignetting
Another potential issue you might run into when adding a vignette is over-vignetting. This occurs when the vignette is too strong and begins to detract from the subject of the photo.
Several solutions can help solve this issue:
- Reduce the size of the vignette, making it less overpowering.
- Adjust the ‘amount’ slider to lower the intensity of the vignette effect.
- Consider using a different vignette style or pattern that softens the edges, resulting in a more subtle effect.
Correcting Vignetting In Editing
If you’ve already applied a vignette to your photo but are unhappy with the results, correcting it during the editing process is often simple.
Consider the following solutions:
- Try to fix the problem in-camera during post-processing by using your editing software’s ‘lens correction’ tool. This setting can help you reduce the vignette effect in your photo.
- Consider carefully selecting specific areas of the photo to apply the vignette effect rather than indiscriminately adding it to the entire photo.
Adding a vignette to your photos can enhance their overall mood and make them more appealing to viewers. While some problems can occur when applying this effect, they are usually easy to fix with a few simple tricks. Keep these solutions in mind, experiment with various settings, and your vignettes are sure to be a success!
Frequently Asked Questions About How To Add A Vignette In Photoshop
How Do I Add A Vignette In Photoshop?
To add a vignette, open your photo in Photoshop, create a new layer, select the ellipse tool, click and drag the shape until it covers your photo, feather the selection, invert the selection, add a layer mask, and adjust the opacity.
What Is A Vignette In Photoshop?
A vignette is a photographic effect where the edges of a photo are darkened or lightened to draw attention to the center of the image.
How Do I Make A Vignette Lighter In Photoshop?
To make a vignette lighter, select the layer mask, choose the brush tool, set the brush to white, paint over the areas that you want to make lighter, and adjust the opacity if needed.
How Can I Add A Colored Vignette In Photoshop?
To add a colored vignette, select the gradient tool, choose a color, drag the gradient tool from the center of the image to the edge, create a new layer, fill it with the same color, and adjust the opacity.
Can I Add A Vignette To Only A Specific Part Of My Photo In Photoshop?
Yes, you can add a vignette to a specific part of your photo in Photoshop by creating a selection around the area, feathering the selection, inverting it, and adding a layer mask to the vignette layer.
Final Words
To conclude, adding a vignette to your photos in Photoshop is an easy and effective way to enhance their appeal. With just a few simple steps, you can create a vignette that draws attention to your subject and adds a professional touch to your images.
Experiment with different styles and settings to make your vignette unique and suited to your personal style. Remember to keep your edits subtle and tasteful, as a heavy-handed approach can be distracting and take away from the overall impact of your photo.
Ultimately, by following this tutorial and practicing your skills, you’ll be able to add vignettes to your images with ease and create stunning results that will impress your audience. So go ahead and give it a try – you won’t be disappointed with the results!